7 SQL Workbench
7.1 Why another client software?
Two ways to connect to the database were already introduced in this manual in sections 4 and 5 for easy and advanced interaction. These two front-end applications run on a web-server making it easy and platform independent to use the database, as no specialized software need to be installed on the users computer. While for most tasks these front-ends do a good job they have two drawbacks:
- As between your computer and the database server there is another (and not quite the fastest) server, hosting the front-end, involved, you will encounter speed limitations when uploading large data sets.
- While you can upload Binary data (“files”), such as project reports, measurement_files, CAD specimen shape files etc., with the already introduced front-end applications, you can download only their hexadecimal representation (as it gets stored in the database) using them. As you likely want to have the files themselves back and also want to avoid manual modification after downloading you need other software doing the decoding work for you.
SQL Workbench solves these two problems with the advantage of being platform independent as its written in Java. Knowing little SQL syntax you can do everything we introduced in the last sections - so why not only using SQL workbench as a client application?
- SQL Workbench runs locally on you computer. Giving support for installation and updating of the software as well as connecting the database is much more time consuming than managing a single web front-end.
- For most of the tasks the web front-ends are more easy to use and more clearly arranged. The most common operations can be done with graphical tools.
That said most of the users will only use SQL workbench if they need to upload large files or work with binary files, but if you manage to install the software yourself and manage to open a connection to the database feel free to use SQL Workbench or any other suitable client software for all database related tasks if you feel more comfortable with it.
7.2 Installation
The next sections are an extended version of the instructions here.
Make sure you have a decent JAVA or OpenJDK installation. Go to this page and download either the generic package of SQL Workbench for Linux or Windows, or the MacOS version of the software.
If you are running Linux (or another Unix® like operating system) you can use the supplied shell script sqlworkbench.sh to start the application.
If you are using Microsoft Windows® start the application by double-clicking the SQLWorkbench.exe executable. If you are using a 64bit operating system and a 64bit Java runtime, you have to use SQLWorkbench64.exe instead.
7.3 Driver
Download the PostgreSQL JDBC driver for your JAVA version here.
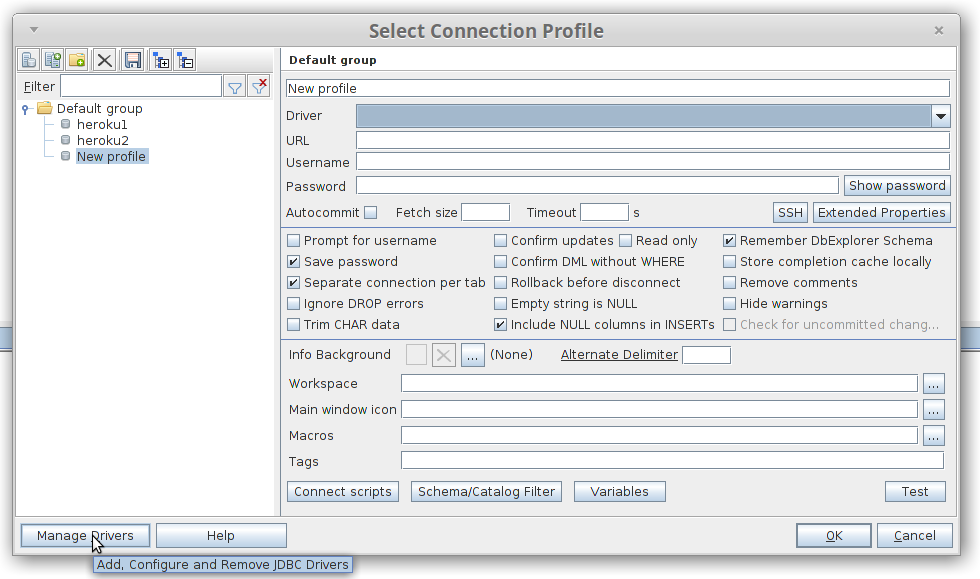
You have to show the software the location of your Postures JDBC driver: Therefore click on Manage Drivers on the bottom-left of the connection window after you opened SQL workbench:
Next select PostgreSQL at the list on the left:
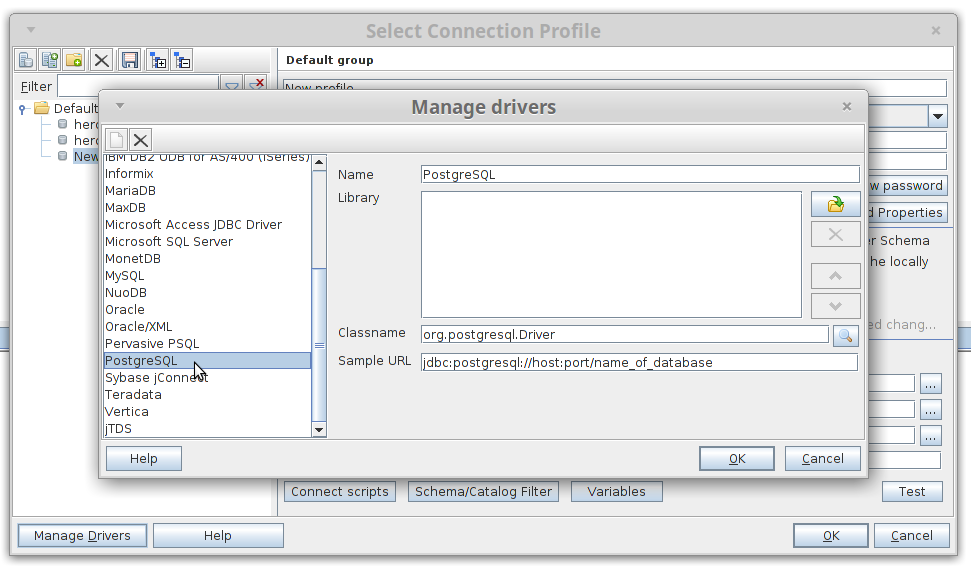
then click on the folder symbol

and select the previously downloaded driver file (ending with .jar)

Then click on OK.
7.4 Database connection
At the connect window (in case you closed it go to File -> Connect Window) enter
- Driver: select PostgreSQL (org.postgresql.Driver)
- URL: copy the URL below:
jdbc:postgresql://dazzling-calculator-894.db.databaselabs.io:5432/iht_database?sslmode=require- Username: your user name
- Password: your password
Click on OK to connect.
7.5 Selecting external tools to view files
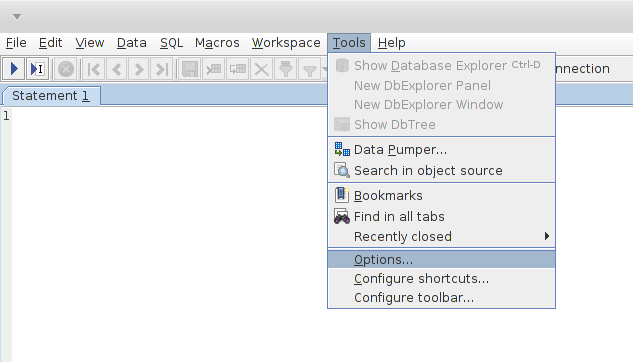
To open files stored within the database you need to tell SQL Workbench paths to programs you use to view the files. Therefore, click on Tools -> Options
Then select External Tools in the list to the left
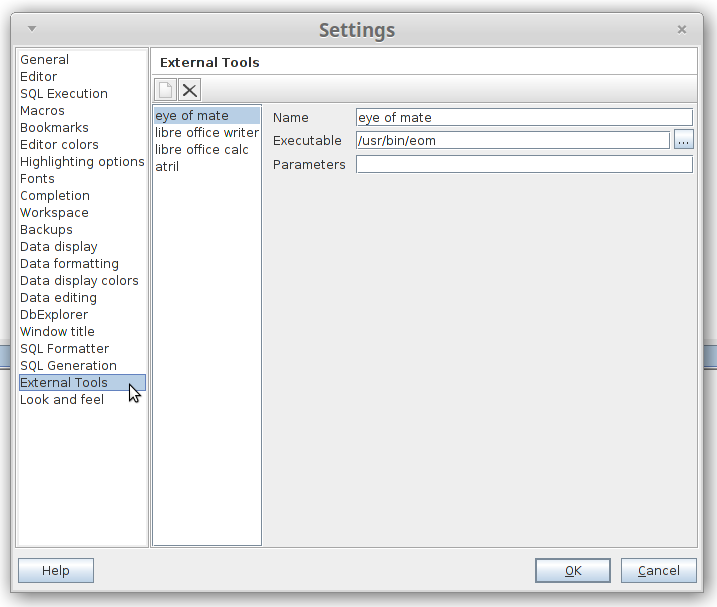
Click on the page symbol to add a new application and enter an application-name and select the path to the program
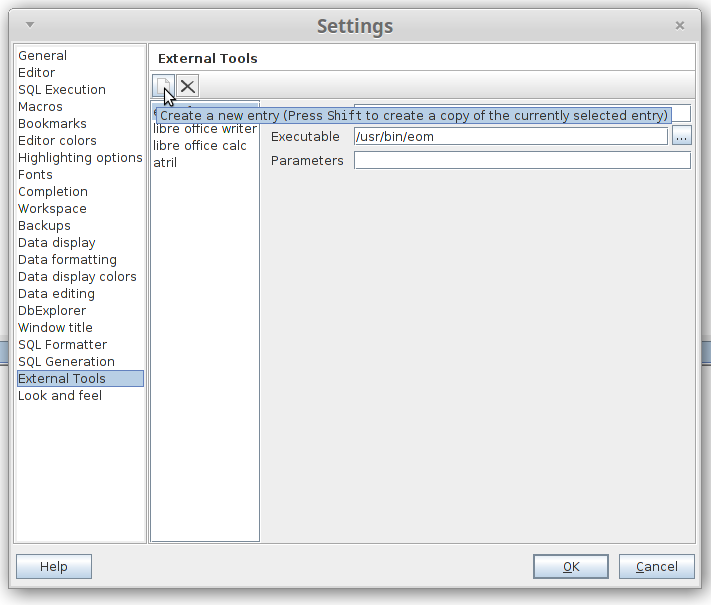
When you added all intended programs (at least one spreadsheet program, one image viewer and a pdf viewer) click OK.
7.6 Basic usage
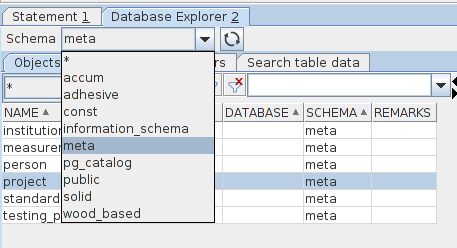
Click on Tools –> Show Database Explorer or press Ctrl + D to open the database explorer. Now you can select a schema at the Schema drop-down menu.
In the Objects tab click on the name of the table you want to open. 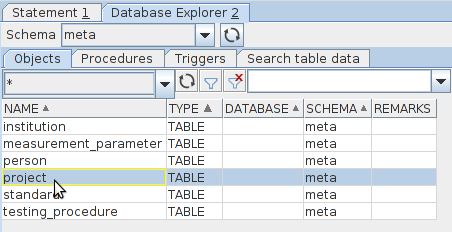
You then see the structure of the table to the right. Click on the Data tab to get to the data stored within the table.
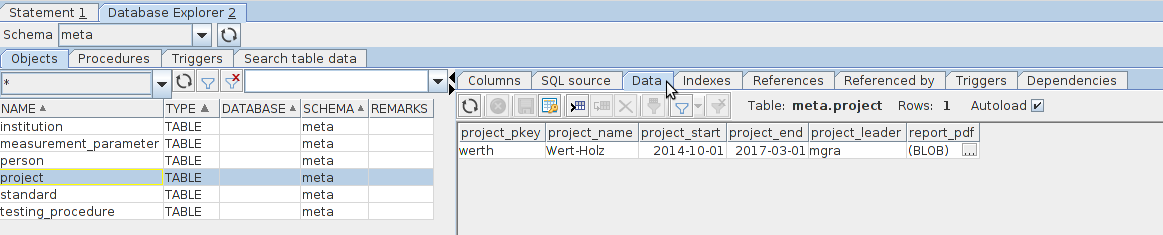
In our example there’s only one row in the table project, you will likely see many more rows. If no rows are appearing, then autoload is most likely disabled in your settings. You can always click on the reload symbol  to load data from the database (also to load schemas and tables).
If you want to look for certain rows you can click on the filter symbol (looks like a funnel) and add several filter criteria.
You can sort the table by clicking on column-names.
If you make changes in the data a rhomb appears left of the row which means that changes were made in the row but weren’t saved to the database yet. Click on the floppy symbol to save your changes to the database. If you undeliberately click on the reload button instead, the data gets loaded again from your database and changes are undone.
7.7 Upload binary files (BLOBs)
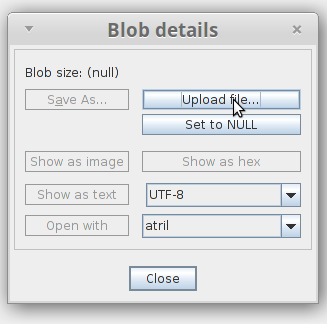
In some cases you want to attach binary files (such as images, PDFs or other) to entries in the database (e.g. attach a project’s report to the project entry, save the measurement file with the stress–strain curve to a measurement etc.). Once you found the row where you want to add a binary file (called Binary Large OBject = BLOB related to databases) to, just click on the box with three dots (…) in the respective column.

A dialog opens where you can click on Upload file… and select a file to add to the database.
Now a rhomb appears left of the row which means that changes were made in the row but weren’t saved to the database yet. Click on the floppy symbol to save your changes to the database. If you undeliberately click on the reload button instead, the data gets loaded again from your database and changes are undone.

Please make sure you just upload files with reasonable size - consider compressing images and pdfs before uploading.
7.8 Download binary files (BLOBs)
You probably recognized that in binary columns SQL Workbench prints “(BLOB)” when a file was inserted, but nothing is appearing on empty cells. If you want to open a BLOB its good to have an idea what file type you can expect. You either see the intended file-type in the column header (as in our example) or a column is beneath specifying the file-type of the uploaded file. Click on the box with three dots (…) in the respective cell.
Now select a program you added as described above at the drop-down menu at the bottom and press on open with just left of it.
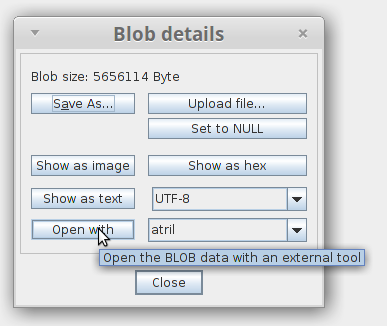
Your file should now open in the external program.
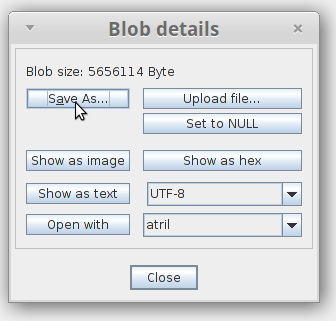
Alternatively you can save your file to disk by clicking on Save As…. Don’t forget to name your file with an appropriate file ending.
7.9 Advanced usage
You can do much more with SQL Workbench than described here in the manual. Please refer to the official software manual to learn more about SQL Workbench.